LOGIN
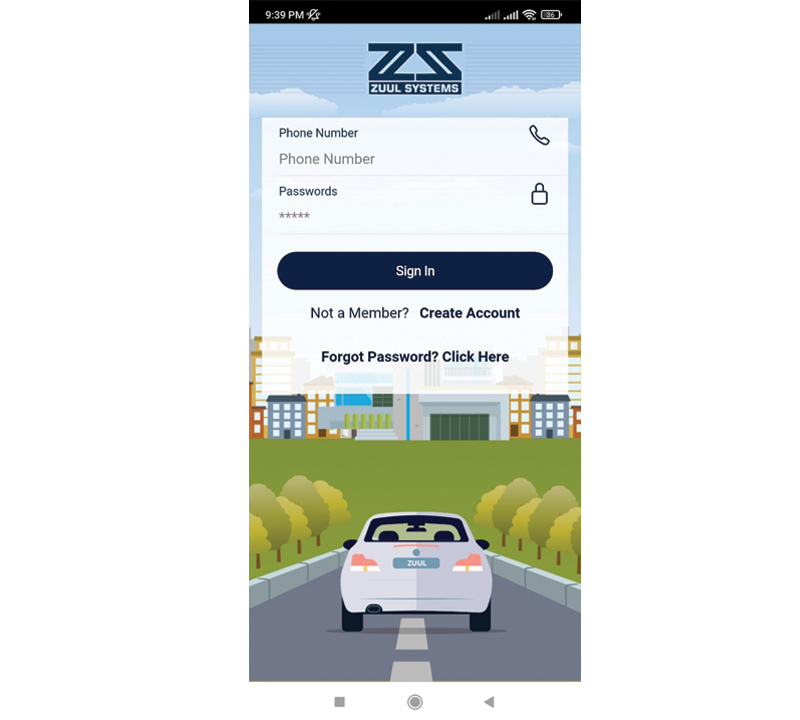
Logging in is simple, too. Enter your phone number and password. Then, press the Sign In button.
BECOME A GUEST MEMBER
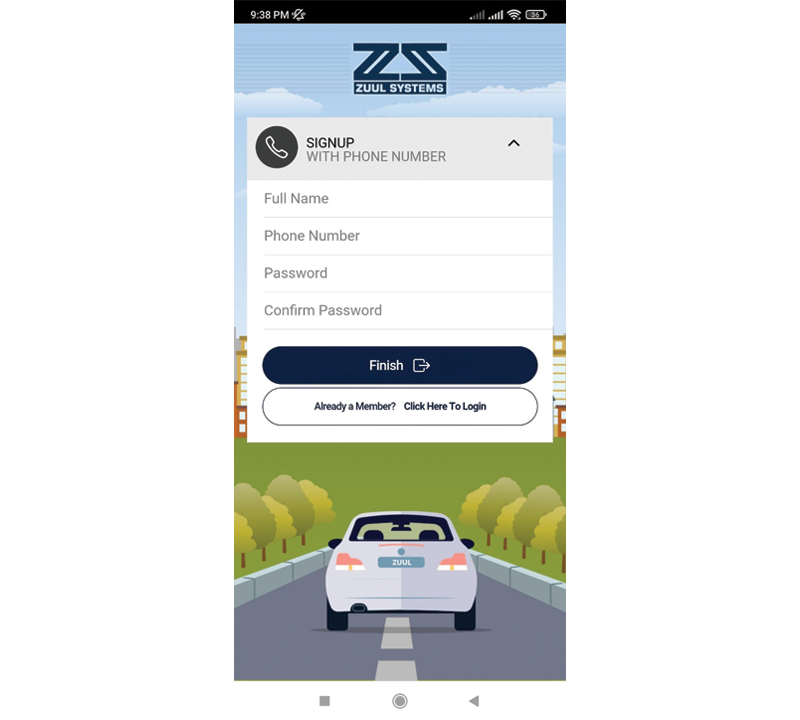
Becoming a guest member of ZUUL Systems is easy. Provide your full name, phone number, and password to sign up.
CREATE YOUR PROFILE
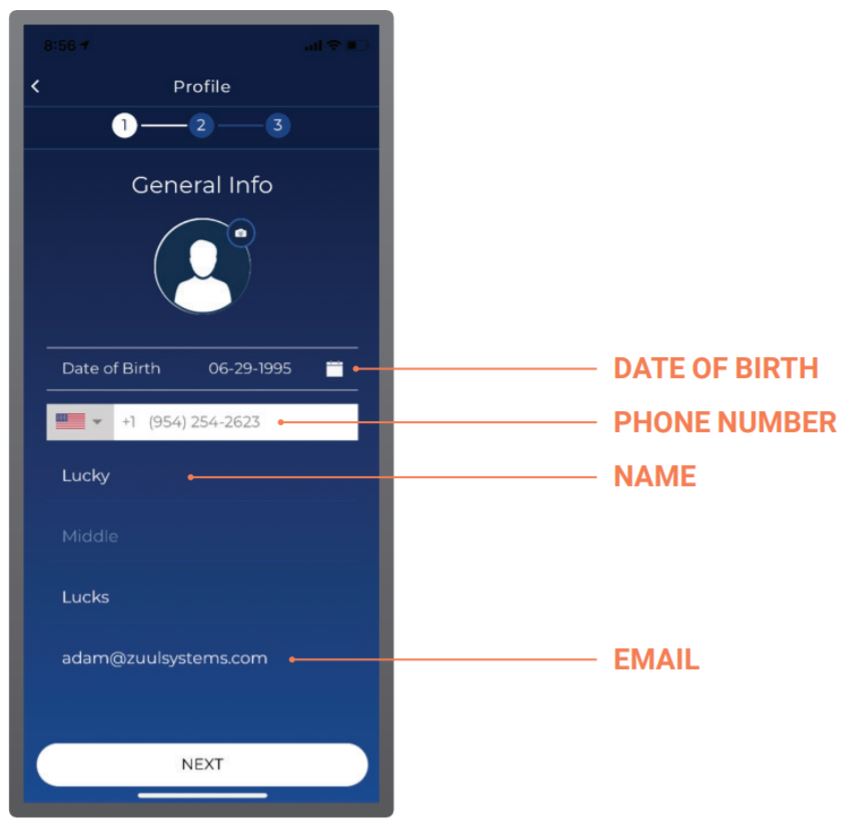
GENERAL INFORMATION
Your profile can be created in only three easy steps. First, fill out your general information.
CREATE YOUR PROFILE
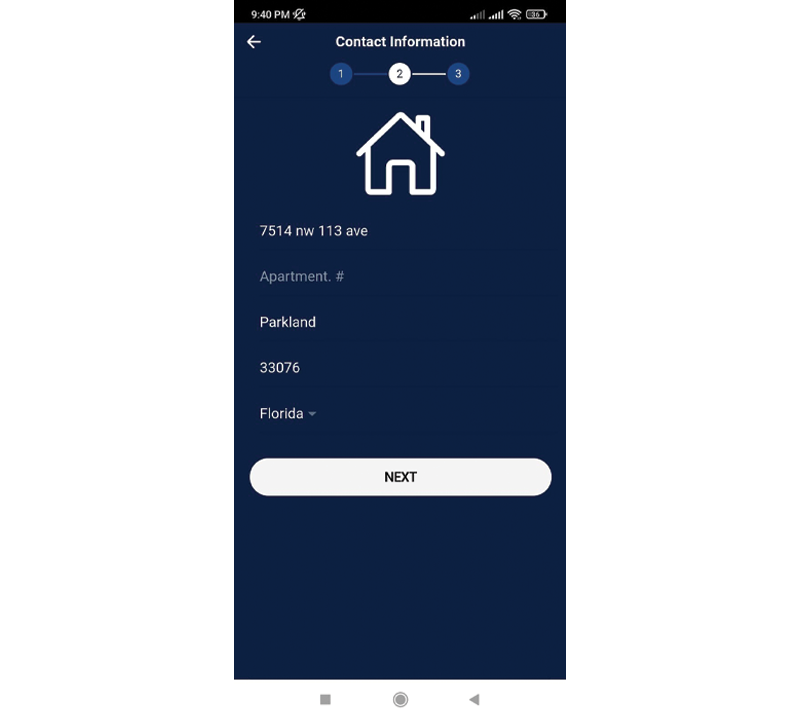
CONTACT INFORMATION
Next, fill out your address.
CREATE YOUR PROFILE
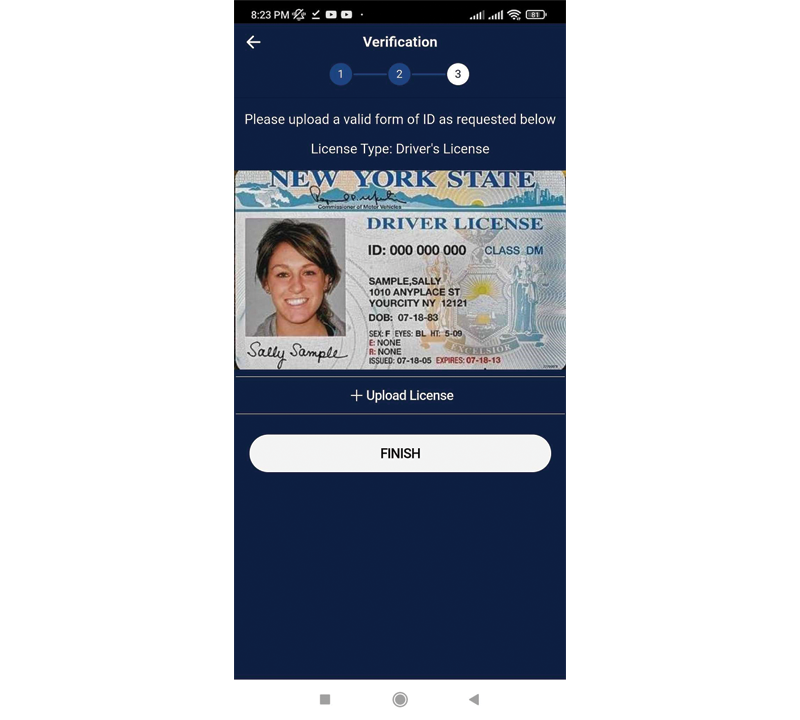
UPLOAD LICENSE
Press the Upload License tab and choose how you want to upload your image, by camera or gallery. Select your image and press the Finish button.
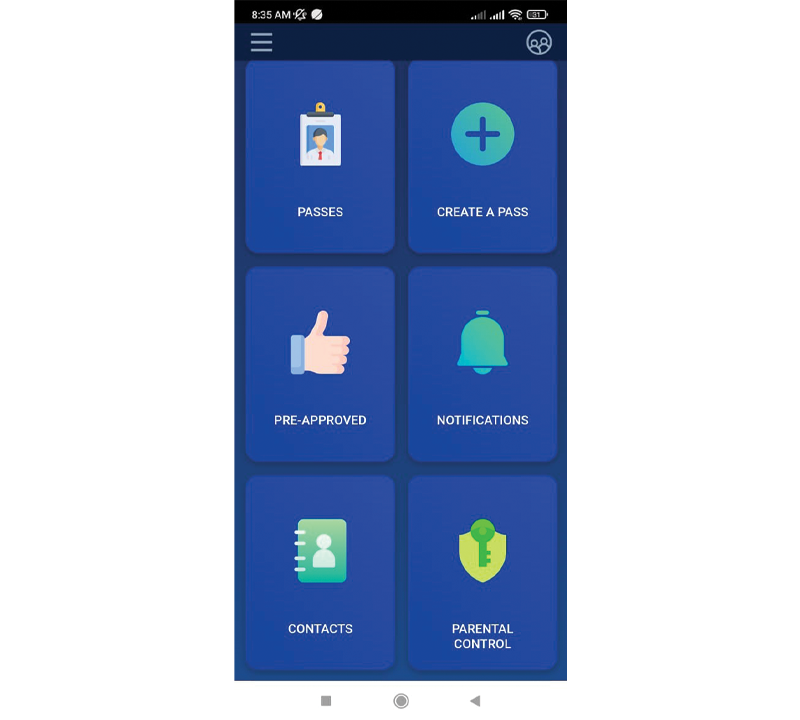
DASHBOARD
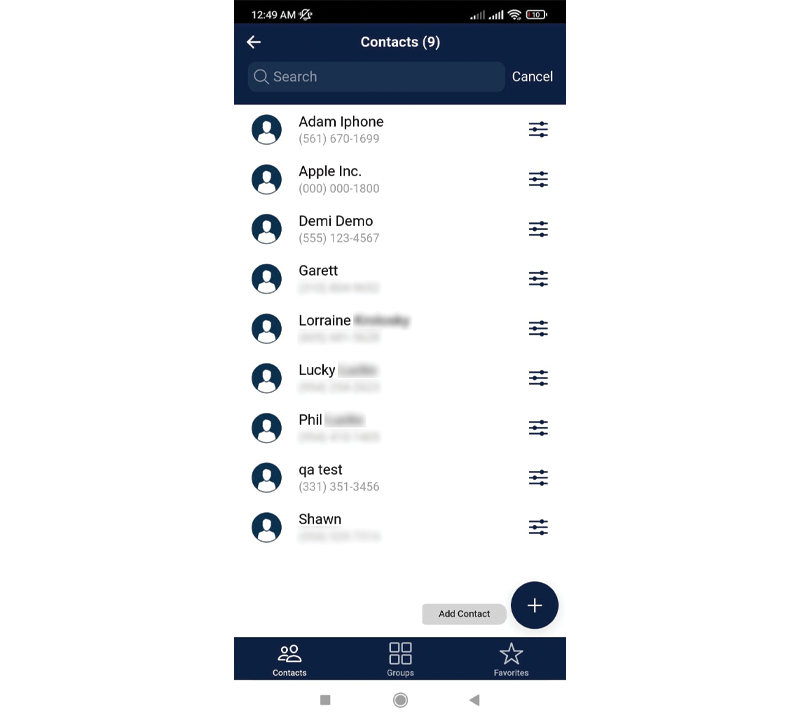
MY CONTACTS
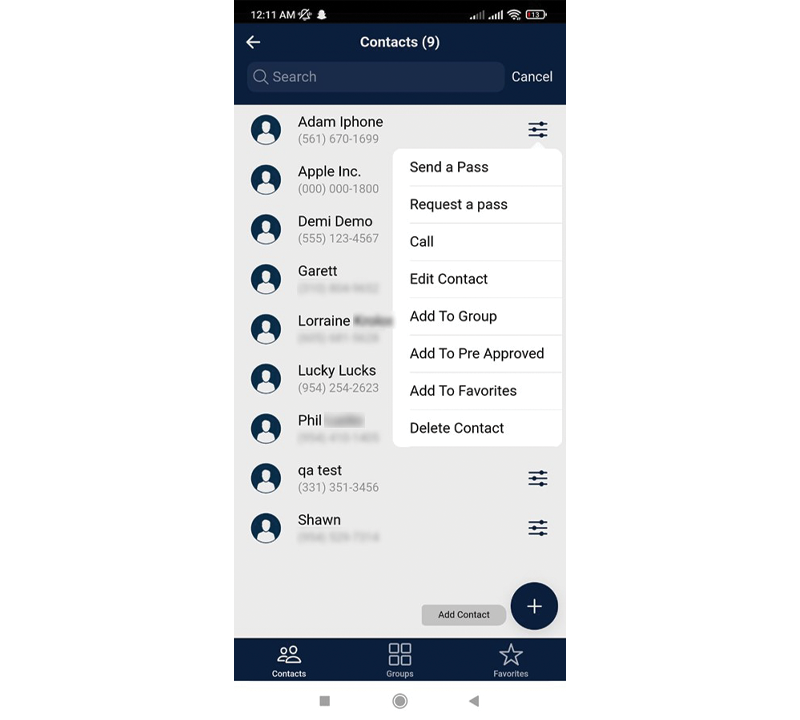
Press an individual contact’s Small Navigation Menu on the My Contacts screen for various options, including sending a pass, calling a contact, editing a contact, adding a contact to a Group, adding a contact to Favorites, or deleting a contact.
MY CONTACTS
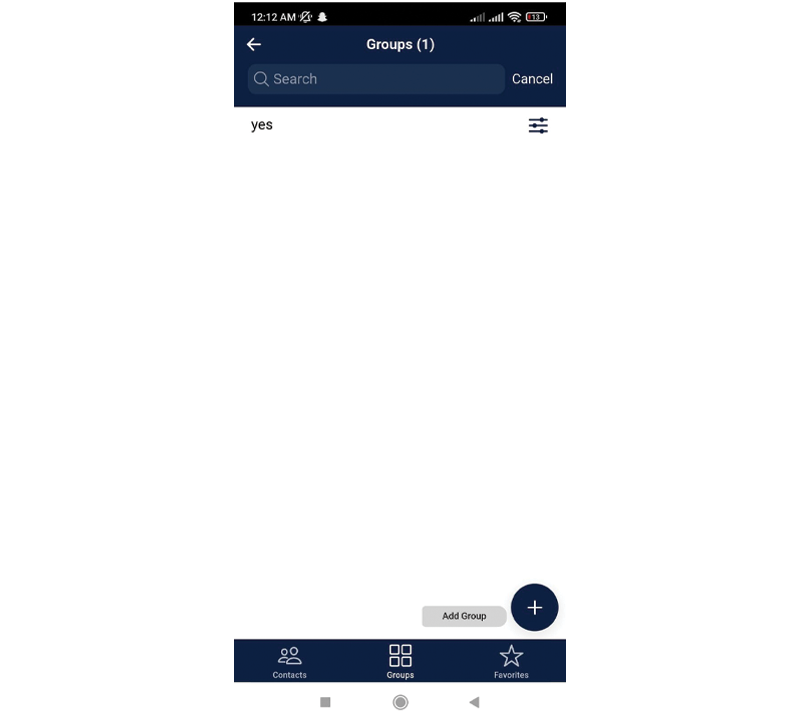
CREATE CONTACTS, GROUPS, AND FAVORITES
View a full list of your contacts, your contacts organized into groups, or contacts marked as favorites under My Contacts.
To add groups, click the Add Group button at bottom-right corner.
MY CONTACTS
ADD CONTACTS
To add contacts in ZUUL, press the Add Contact button at bottom-right corner. Contacts can be added manually or they can be imported directly from your mobile device.
PRE-APPROVED GUESTS
LIST OF PRE-APPROVED
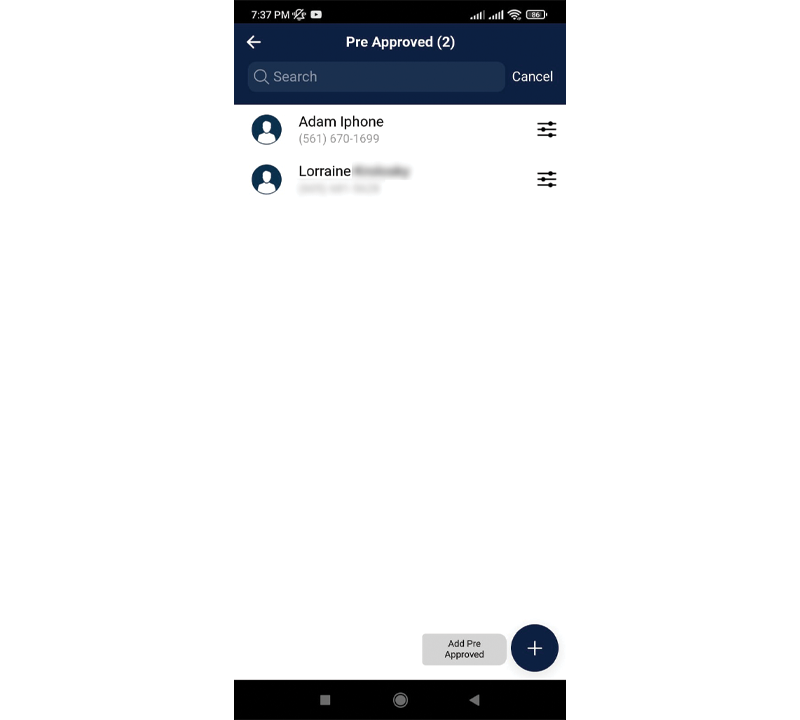
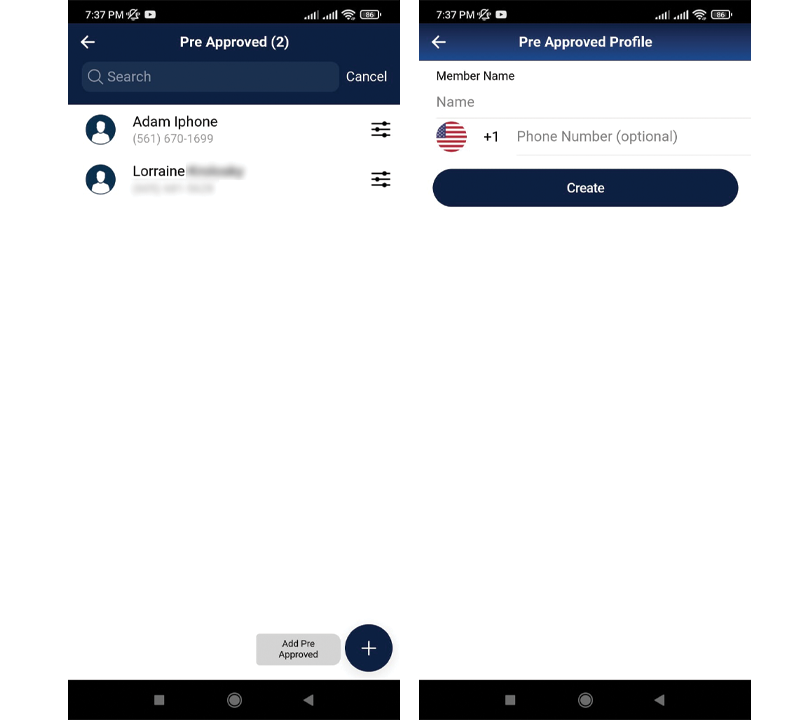
Once you press on the Pre-Approved tile on your dashboard, you will be brought to a list of anyone put on your pre-approved list.
PRE-APPROVED GUESTS
ADD PRE-APPROVED GUESTS
Press the + sign in the bottom right corner where it says Add Pre Approved. For family and friends enter both their name and cell phone number and press Create. For vendors and delivery, type the name in only and press Create.
PRE-APPROVED GUESTS
REMOVE / SHARE
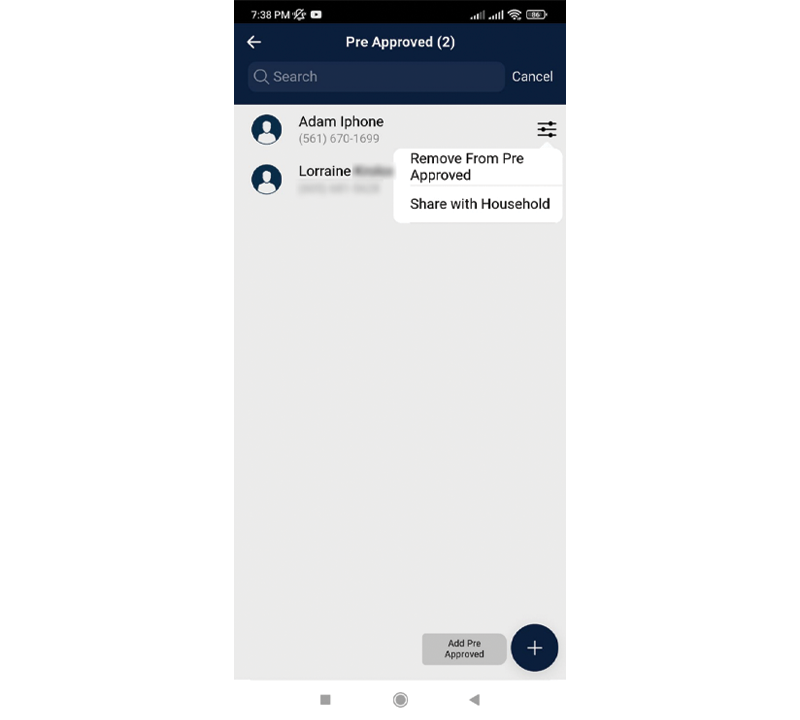
Press the menu tab, and you can elect to remove an entry or Share with Household (This allows your entry to show up on the pre-approved list of every member in your household).
CREATE A PASS
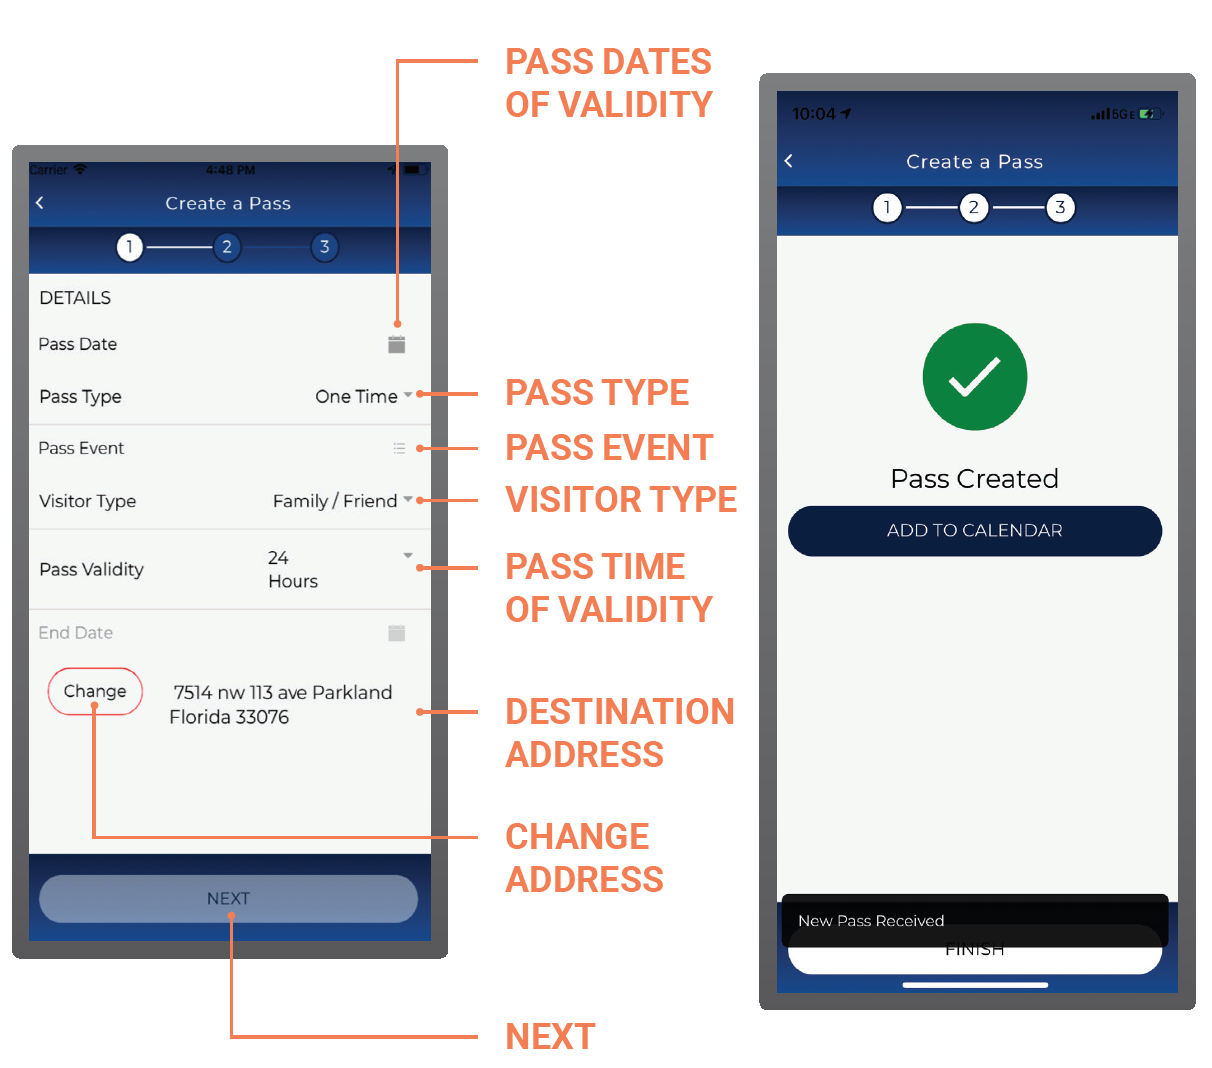
To create a pass, start by entering the date and time the pass will become valid in the Pass Date field. Then, fill out the Pass Type field. You can choose to send a one-time pass, a recurring pass, or a pass to yourself.
Proceed to choosing the reason for the visit in the Pass Event field and your relationship to the pass provider in the Visitor Type field. Choose the length of time the pass will be active under the Pass Validity field. Confirm the address of the final destination. The address will default to your home address, but you can edit it by pressing the Change button.
PASS DETAIL
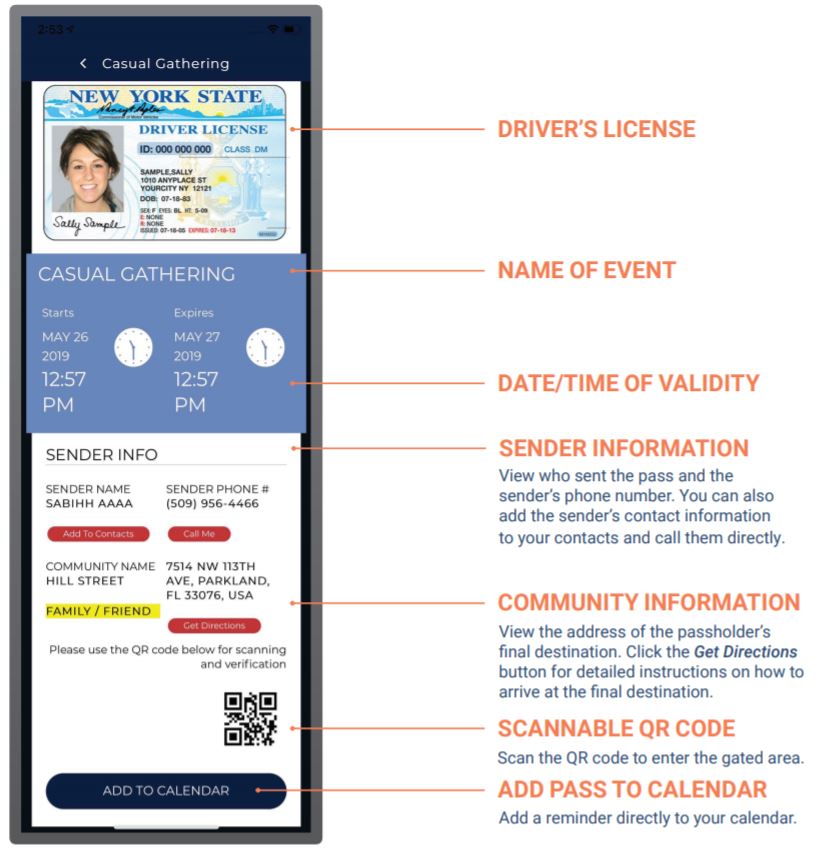
The pass details include all of the information you, your guests, and guards need regarding access.
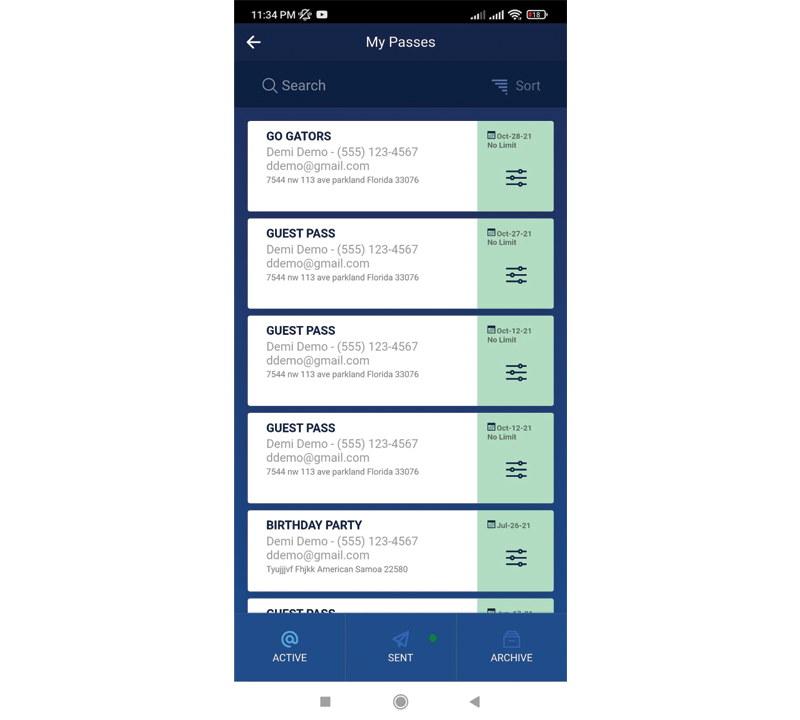
MY PASSES

ACTIVE PASSES
On the My Passes dashboard, click the Active tab to view active passes. You can sort your active passes by community, sender, event name, or date.
MY PASSES
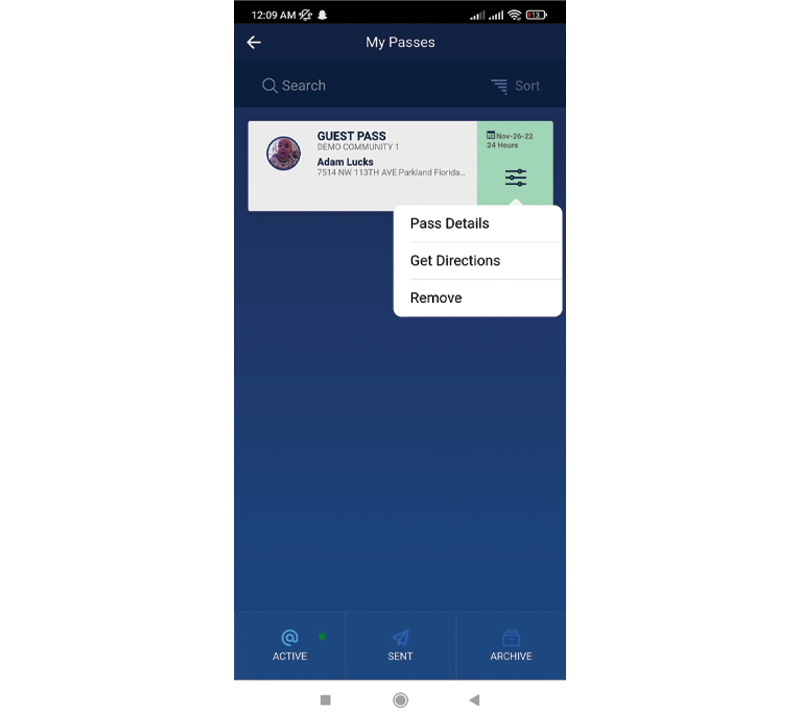
VIEW DETAILS/GET DIRECTIONS
Click on an active pass to view its details or get directions to your final destination. If you don’t want your pass any longer, you can remove it from your list.
SENT PASSES
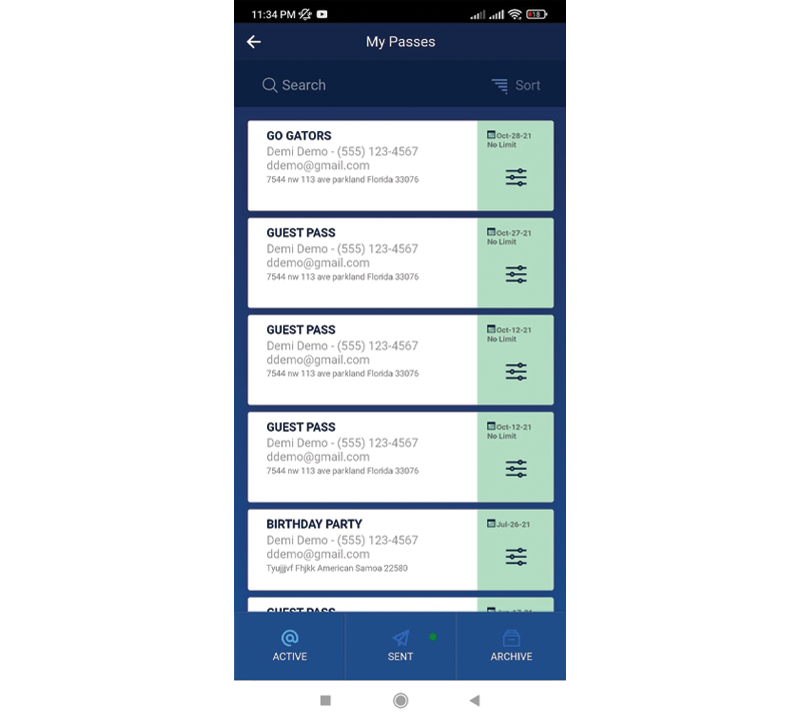
On the My Passes dashboard, click the Sent tab to view sent passes. You can sort your active sent passes by community, sender, event name, or date.
SENT PASSES
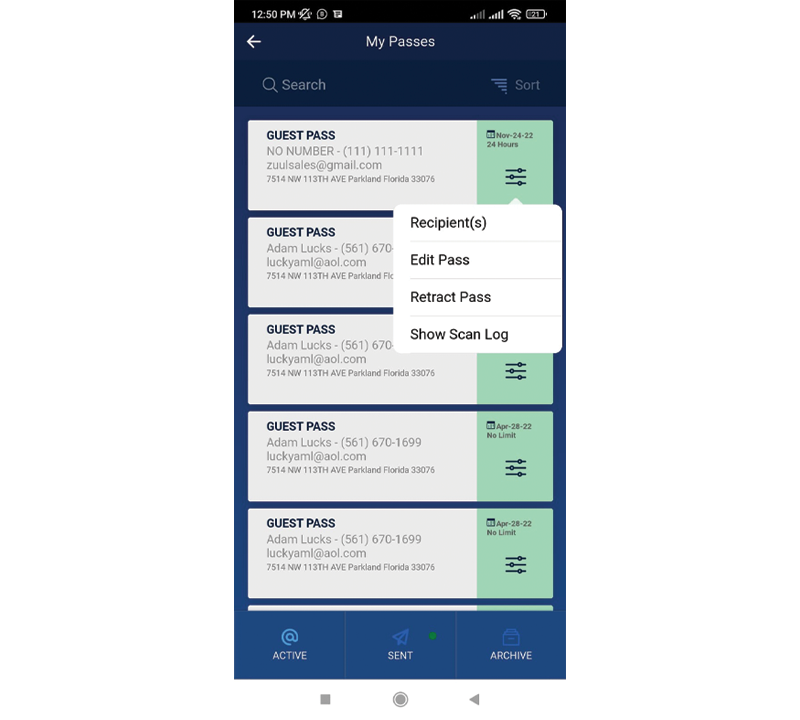
RETRACT ENTIRE PASS
You can view some options for Sent Passes by clicking the options bar.
Recipient(s), Edit Pass, Retract Pass, Show Scan Log.
SENT PASSES
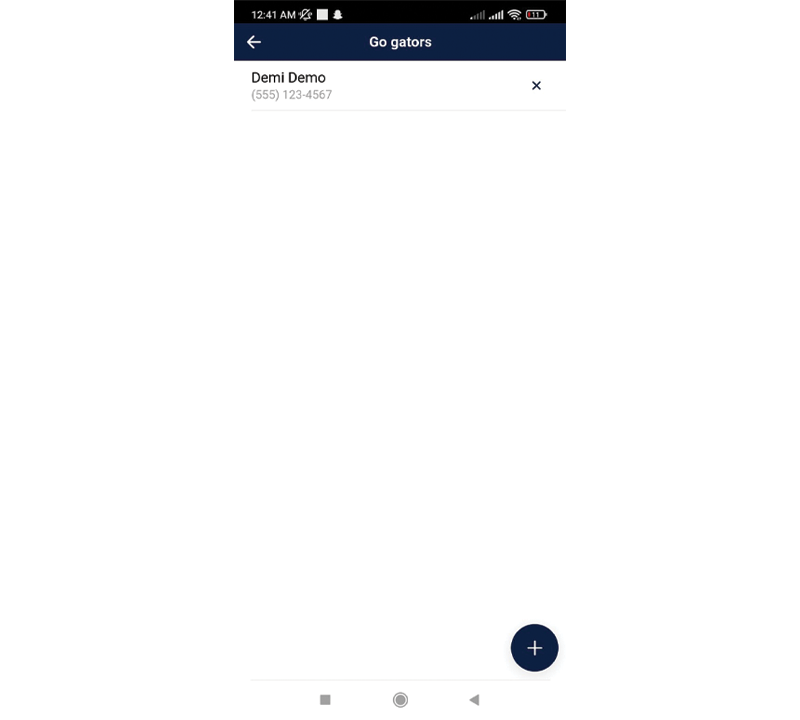
ADD/DELETE RECIPIENTS TO AN ACTIVE PASS
To add a recipient to an active pass, click the Add Recipient button at the bottom-right corner.
To delete a recipient of an active pass, click the X to the right of their name.
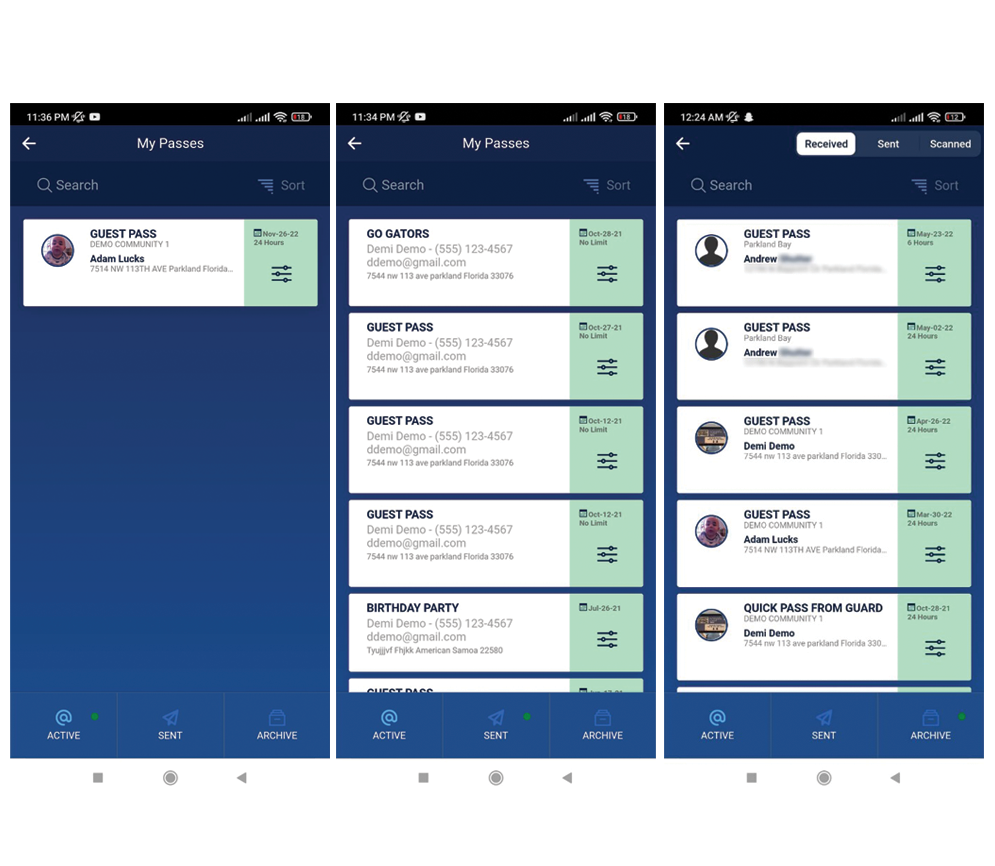
ARCHIVED PASSES
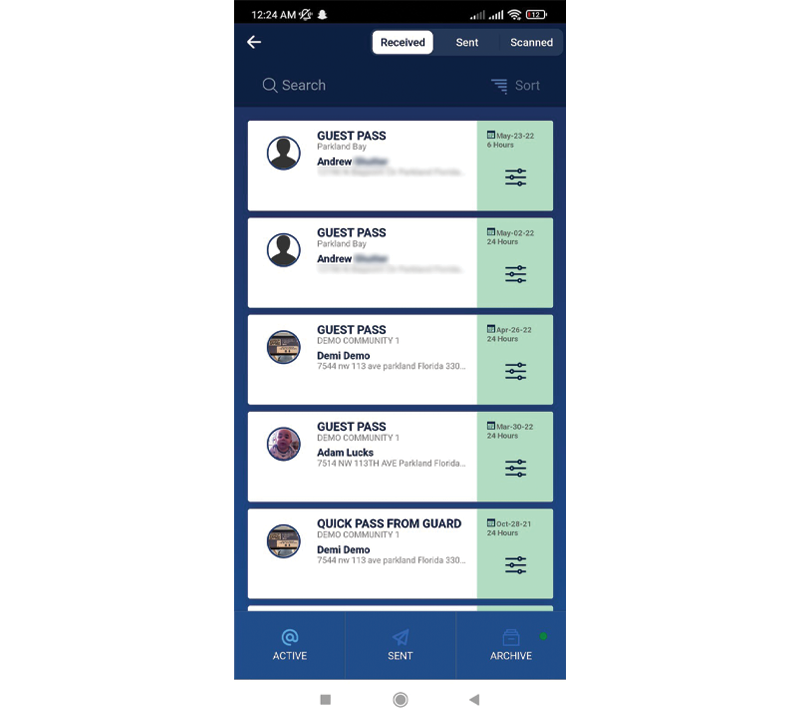
RECEIVED PASSES
On the My Passes dashboard, click the Archived tab to view archived passes. This screen will show your archived received passes.
You can sort your archived received passes by community, sender, event name, or date.
ARCHIVED PASSES
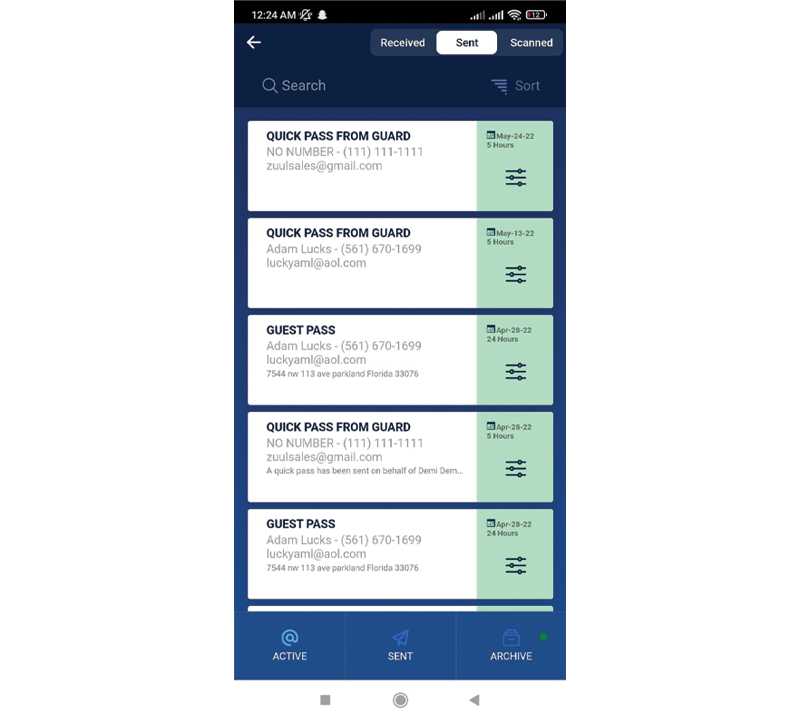
SENT PASSES
On the My Passes dashboard, click the Archived tab to view archived passes. This screen will show your archived sent passes.
You can sort your archived sent passes by community, sender, event name, or date.
PARENTAL CONTROLS
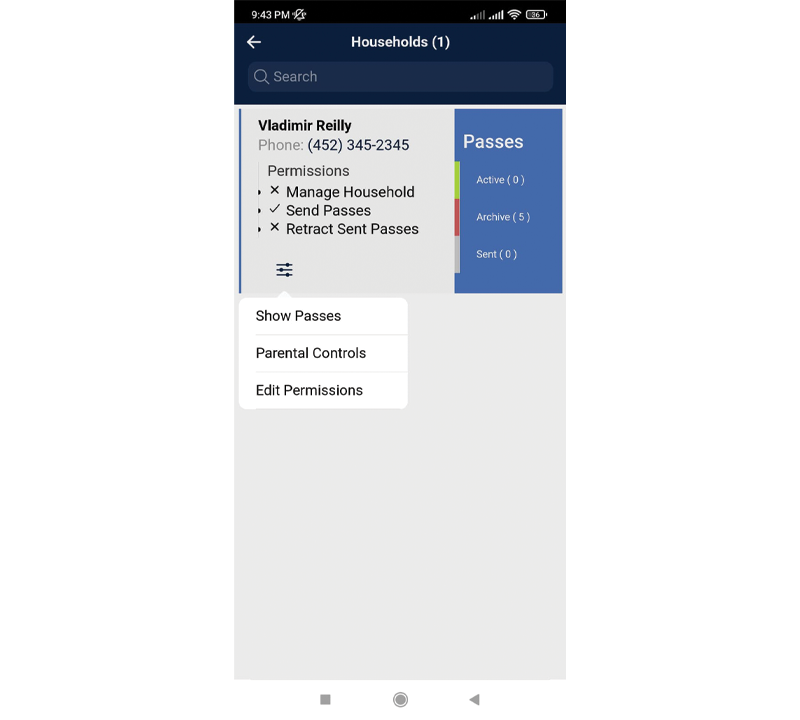
Pressing the Small Navigation Menu on the My Household page takes you to a screen where you can customize Show Passes, Parental Controls, and Edit Permissions.
PARENTAL CONTROLS
MANAGE MEMBER PASSES
View the passes that have been issued by the members of My Household.
PARENTAL CONTROLS
VIEW/RETRACT MEMBER PASSES
View a My Household member’s active, archived, and sent passes. Press on the menu tab of a Household Member’s sent pass. Press Retract Pass to void he pass sent to all recipients.
PARENTAL CONTROLS
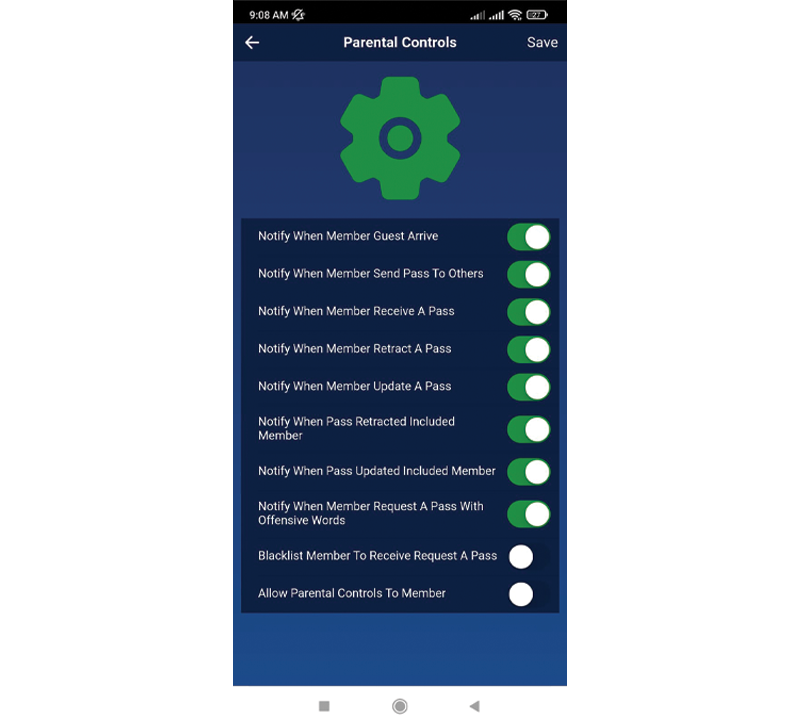
PARENTAL CONTROLS
For those with permission, you can customize your notifications for each member of My Household. This feature allows a user to monitor the activity of a specific My Household member.
NOTIFICATIONS
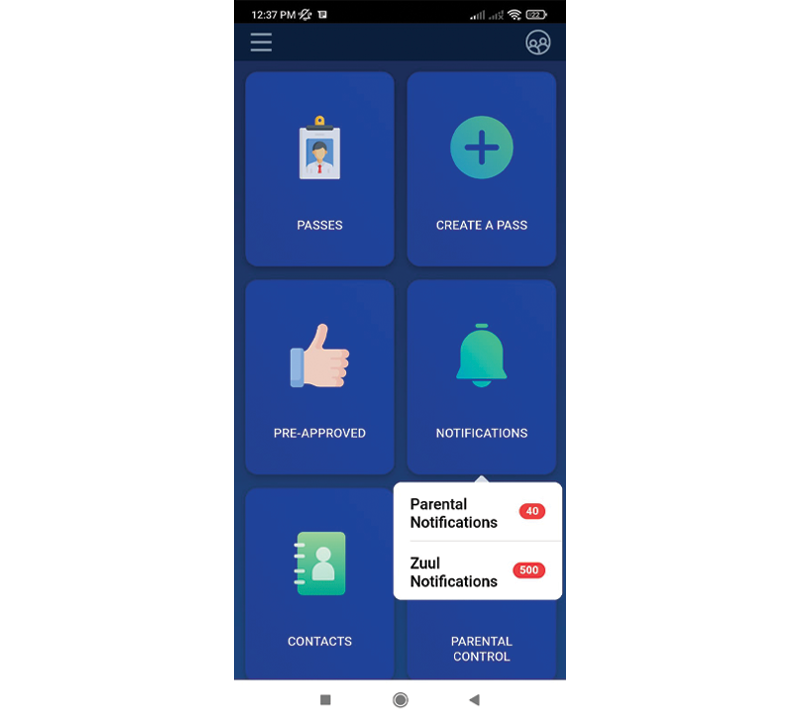
You can access your notifications by using the Notification box on your Dashboard. When tapping on the Notification Box you can see the unread notification and the quantity of the notifications.
NOTIFICATIONS
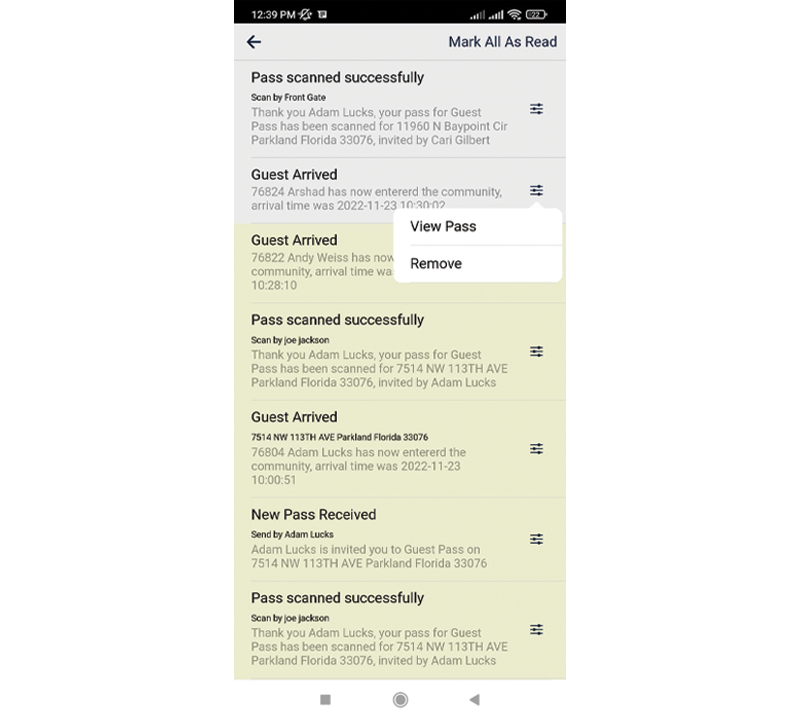
VIEW/DELETE PASS NOTIFICATION
On the Notifications screen, you’ll be able to accept or deny any pass requests, view current passes, and view all other notifications.
To delete a notification, press the menu tab and press Remove. View Pass only work when you have received a new pass.
NAVIGATION MENU
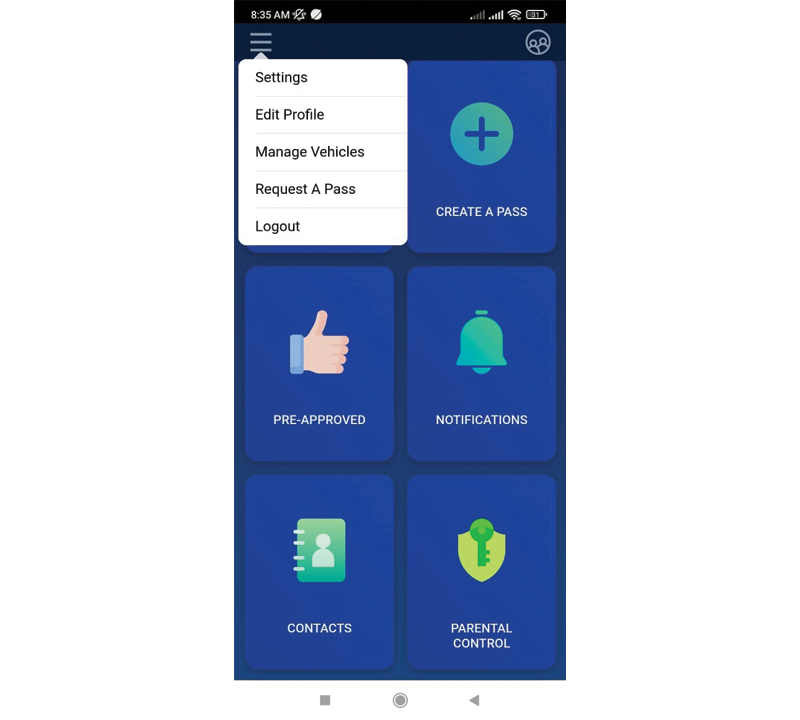
By pressing the Navigation Menu (the three lines in the upper-left corner), you will see the following menu options:
Settings(where you turn on/off push and email notifications), Edit Profile, Manage Vehicles, Request A Pass, and Logout.
SETTINGS
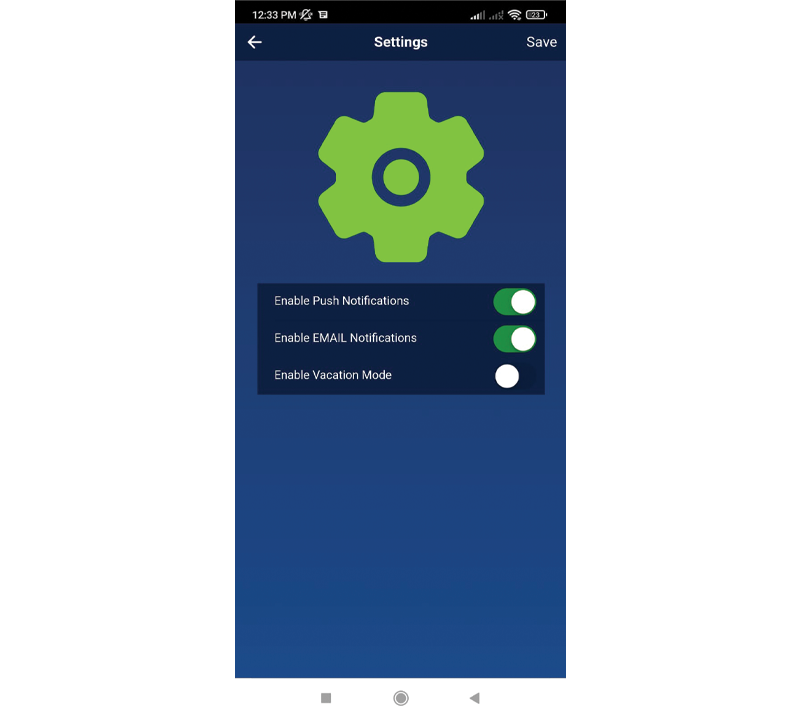
Customize your push and email notifications, and turn on vacation mode using the Settings menu.
FORGOT PASSWORD
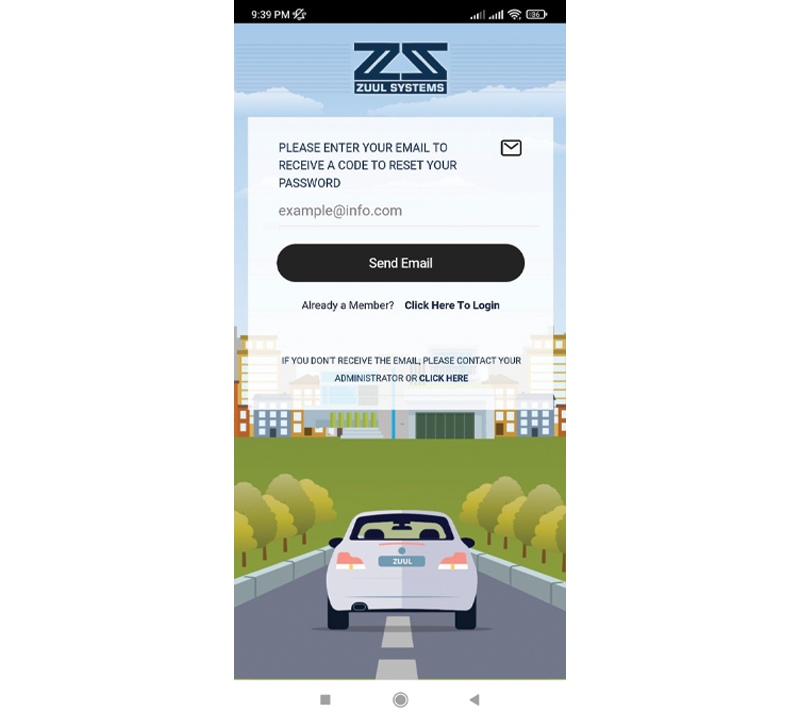
There’s no need to worry if you lose or forget your ZUUL password. All you need to do is enter your email in the designated field and press send. You will receive an email shortly after with an account recovery link and instructions to follow. The password recovery process only takes a few seconds!
REQUEST A PASS

On the Request a Pass screen, you can request a pass from a resident who is an existing contact or new contact.
REQUEST A PASS
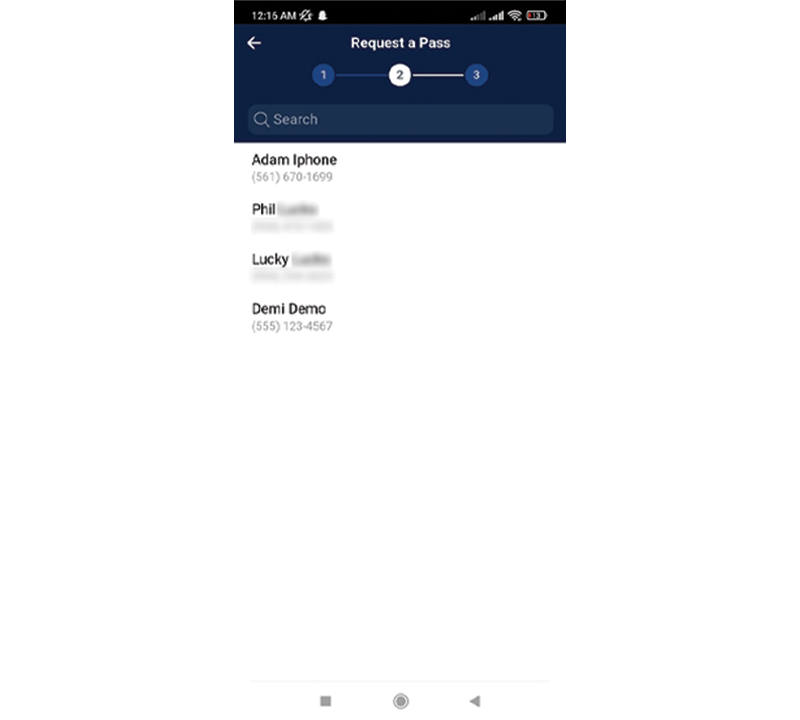
EXISTING CONTACT
If the contact you are requesting a pass from already exists, press the circle next to that contact’s name. Then, press the Next button at the bottom of your screen.
REQUEST A PASS

REASON FOR VISIT
In the Comments field, enter the reason for your visit. For example, if you’re delivering pizza, you might enter “Pizza Party.”
Then, press the Next button at the bottom of your screen.